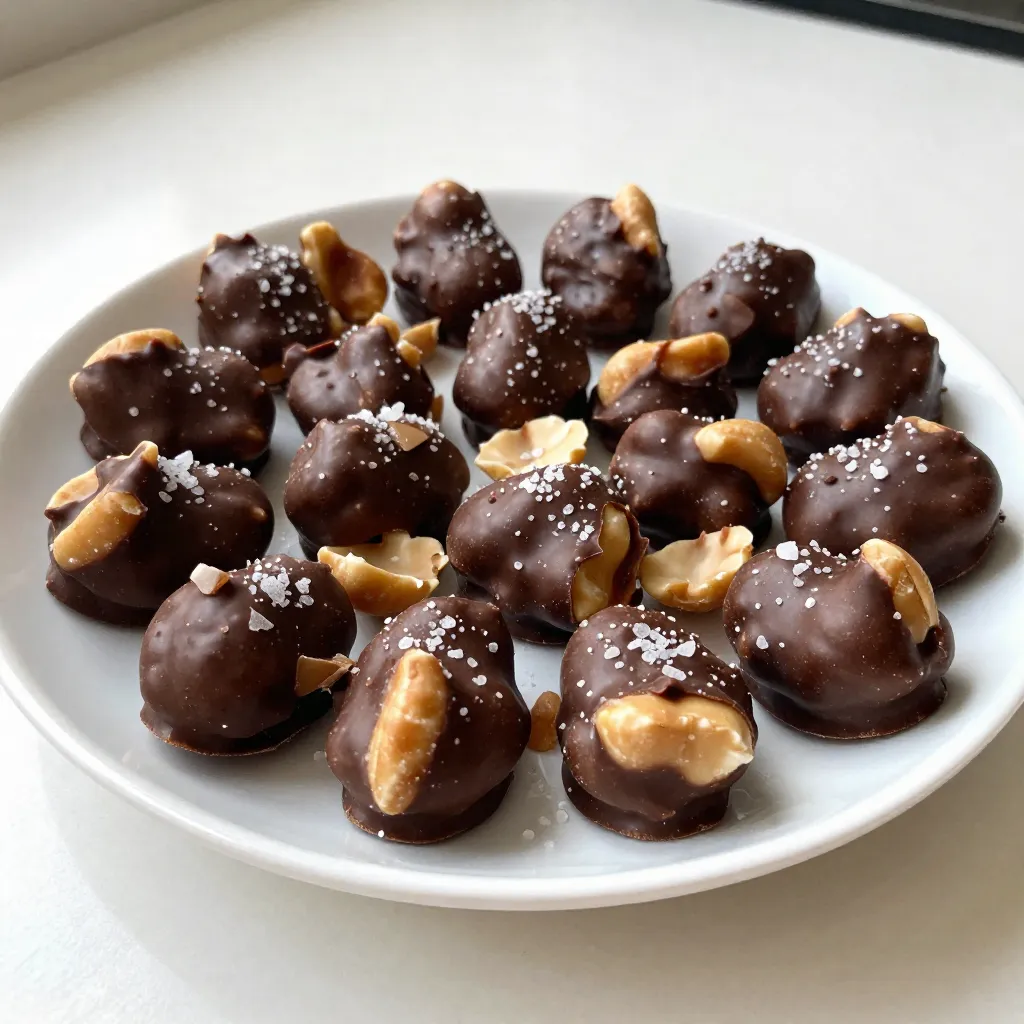
If you crave a sweet and salty treat, chocolate-covered peanut clusters are a must-try! These delights combine crunchy peanuts and rich chocolate for a snack that hits the spot. In this guide, I’ll walk you through each step, sharing simple tips and tricks to ensure your clusters turn out perfectly every time. Get ready to indulge in this tasty bliss treat that’s a hit with everyone!
Why I Love This Recipe
- Simple Ingredients: This recipe uses just four easy-to-find ingredients, making it accessible for everyone to whip up a batch of delicious treats.
- Quick Preparation: With only 15 minutes of prep time, you can have these delightful chocolate-covered clusters ready in no time.
- Sweet and Salty Combination: The addition of sea salt enhances the flavor profile, creating a perfect balance between sweet and salty that is simply irresistible.
- Perfect for Gifting: These clusters make for a charming homemade gift, especially when packaged in colorful bags and tied with twine.
Ingredients
List of Ingredients
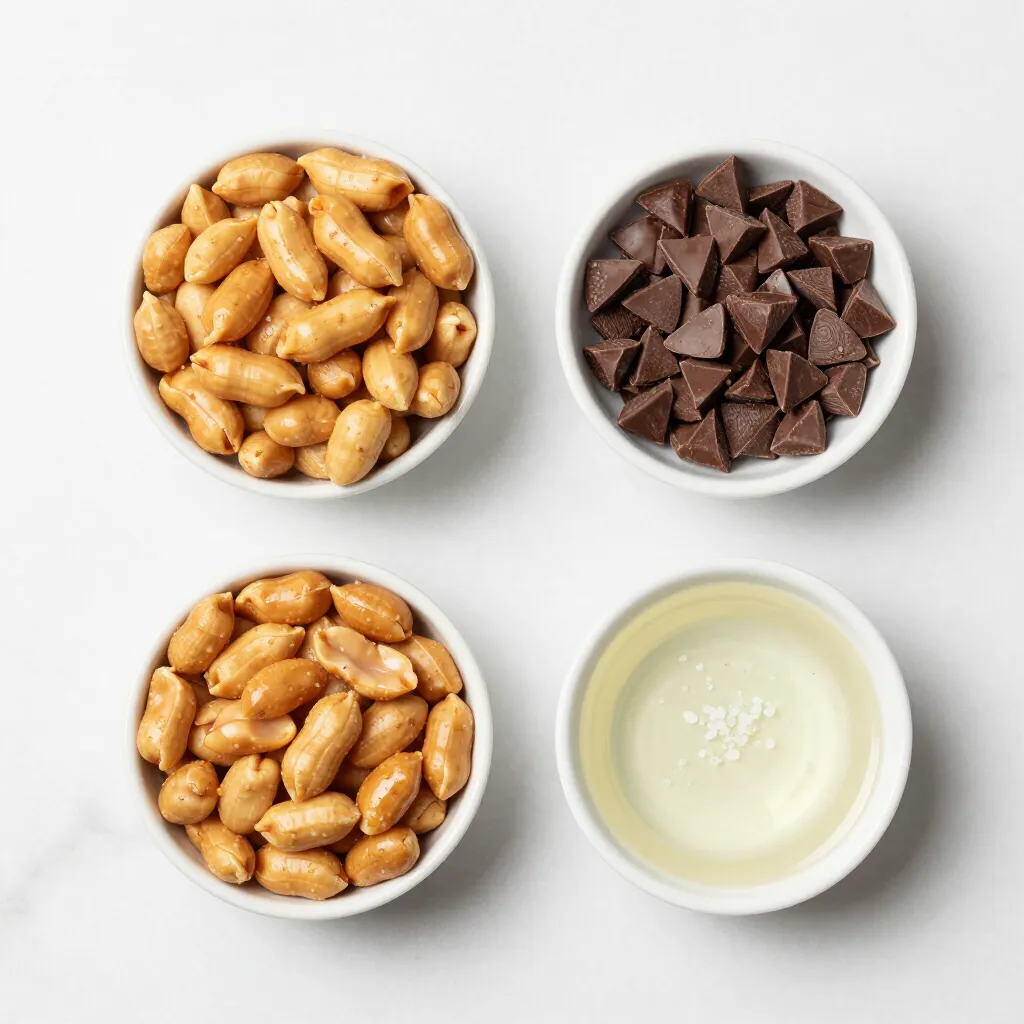
– 2 cups roasted unsalted peanuts
– 2 cups dark chocolate chips
– 1 tablespoon coconut oil (optional)
– Sea salt for sprinkling (optional)
When making chocolate-covered peanut clusters, the right ingredients matter. You need roasted unsalted peanuts for crunch and flavor. The dark chocolate chips provide a rich taste that pairs well with the peanuts. If you want a smoother chocolate, add coconut oil. It gives a nice texture that melts in your mouth. Lastly, sprinkle sea salt on top if you enjoy a sweet and salty mix. This simple list makes it easy to whip up a tasty treat!
Step-by-Step Instructions
Preparation of the Baking Sheet
Start by lining your baking sheet with parchment paper. This step is key. It keeps your clusters from sticking and helps with easy removal later. Make sure to smooth it out well.
Melting the Chocolate
For the chocolate, use a microwave-safe bowl. Place the dark chocolate chips in the bowl. If you want a creamier texture, add the coconut oil now. Heat it in the microwave for 30 seconds. After each round, stir well. Repeat this until the chocolate is smooth and melted.
Coating the Peanuts
Once the chocolate is melted, fold in the roasted unsalted peanuts. Be gentle but thorough. You want every peanut to be fully coated in chocolate. This ensures a rich taste in every bite.
Forming Clusters
To shape your clusters, use a tablespoon or a small ice cream scoop. Drop rounded mounds onto the lined baking sheet. Leave some space between each mound. They will spread a bit as they set.
Adding Sea Salt
If you like sweet and salty, sprinkle a pinch of sea salt on top of each cluster. This little touch enhances the flavor and adds a nice crunch.
Chilling to Set
Now, place the baking sheet in the refrigerator. Chill the clusters for about 30 minutes. This helps the chocolate harden completely. You want them firm and ready to eat.
Serving and Storing
After chilling, gently lift each cluster off the parchment paper. Store them in an airtight container. For a softer bite, keep them at room temperature. If you prefer them cool and firm, place them in the fridge. Enjoy your tasty bliss treat!
Tips & Tricks
Achieving the Perfect Chocolate Texture
To get creamier clusters, use coconut oil. This small addition helps melt the chocolate smoothly. Melt dark chocolate chips with the oil in the microwave. Heat for 30 seconds at a time, stirring well. Keep doing this until the chocolate looks shiny and smooth.
Suitable Chocolate Types
You can use different types of chocolate. Dark chocolate gives a rich taste. Milk chocolate is sweeter and creamier. White chocolate adds a unique twist. Choose what you love most. Each type brings its own charm.
Enhancing Flavor and Presentation
To make your clusters look fancy, try garnishing. Add a sprinkle of sea salt on top. This contrast makes the clusters even more exciting. Serve them in a pretty bowl. For gifts, wrap them in colorful bags tied with twine. This adds a personal touch that everyone will love.
Pro Tips
- Choose Quality Chocolate: Using high-quality dark chocolate will enhance the flavor of your clusters. Look for chocolate with at least 70% cocoa content for a richer taste.
- Experiment with Nuts: While peanuts are delicious, feel free to mix in other nuts such as almonds or cashews for a different texture and flavor profile.
- Storage Tips: To keep your clusters fresh, store them in an airtight container in a cool, dry place. If you prefer a firmer texture, refrigerate them.
- Make it Festive: Add a drizzle of white chocolate over the hardened clusters for a decorative touch, perfect for holidays or special occasions.
Variations
Alternative Nuts
You can switch out the peanuts for other nuts. Almonds and cashews work great. Almonds give a nice crunch and a hint of sweetness. Cashews add a creamy texture. Both options taste amazing with chocolate. You can even mix nuts for more fun flavors. Just remember to use roasted and unsalted nuts for the best results.
Different Chocolate Types
While dark chocolate is my go-to, you can try other types too. Milk chocolate offers a sweeter taste that many love. White chocolate is another fun choice. It adds a rich creaminess to the clusters. You can even mix different chocolates for a unique flavor. Just use the same melting method for all types.
Additional Flavorings
Want to spice things up? You can add flavorings to your clusters. A pinch of cinnamon can warm up the taste. Vanilla extract gives a lovely aroma and depth. For a little kick, try a dash of cayenne pepper. These flavorings mix well with chocolate and nuts. Get creative and find the perfect blend!
Storage Info
Best Storage Practices
Store your chocolate-covered peanut clusters in an airtight container. This keeps them fresh and prevents them from absorbing odors from your pantry. You can use glass or plastic containers with tight-fitting lids. If you have a lot of clusters, layer them with parchment paper to avoid sticking. This way, they remain easy to grab.
Room Temperature vs. Refrigeration
You can keep your clusters at room temperature or in the fridge. Storing them at room temperature gives them a softer bite. Just make sure it’s cool and dry. On the other hand, refrigeration makes the chocolate firmer and offers a nice crunch. However, chocolate can get a little dull in the fridge. Choose based on your texture preference!
Shelf Life
Chocolate-covered peanut clusters last about two weeks at room temperature. If you store them in the fridge, they can last up to a month. Just remember that the longer they sit, the more they may lose their crunch. Keep an eye on them to enjoy their best flavor!
FAQs
How do I make chocolate-covered peanut clusters?
To make chocolate-covered peanut clusters, follow these steps:
1. Line a baking sheet with parchment paper.
2. In a microwave-safe bowl, add dark chocolate chips and coconut oil.
3. Heat in the microwave for 30 seconds, stirring in between.
4. Once melted, fold in the roasted peanuts.
5. Drop mounds of this mix on the lined sheet.
6. Optionally, sprinkle sea salt on top.
7. Chill the clusters in the fridge for 30 minutes to set.
This simple process gives you a delightful treat.
Can I use other types of nuts?
Yes, you can use other nuts! Almonds and cashews work great too. Each nut adds a different flavor and texture. You can try mixing nuts for a fun twist! Just keep the amount the same as peanuts. This way, you maintain the balance in your clusters.
What’s the best way to melt chocolate?
For smooth melting, use the microwave. Heat in short bursts of 30 seconds. Stir well after each, so you avoid burning the chocolate. If you want a creamier texture, add coconut oil. It helps the chocolate melt evenly and gives it a nice shine.
Can I store them for a longer period?
Yes, you can store chocolate-covered peanut clusters! Keep them in an airtight container. If you want them soft, store at room temp. For a firmer bite, put them in the fridge. They last about two weeks if stored properly.
In this post, we covered how to make delicious chocolate-covered peanut clusters. You learned about the ingredients, steps for preparation, and storage tips. The recipe offers room for variations, like using other nuts or different chocolates.
Keep experimenting with flavors and enjoy your treats. Remember, the joy is in the process. Happy cookin