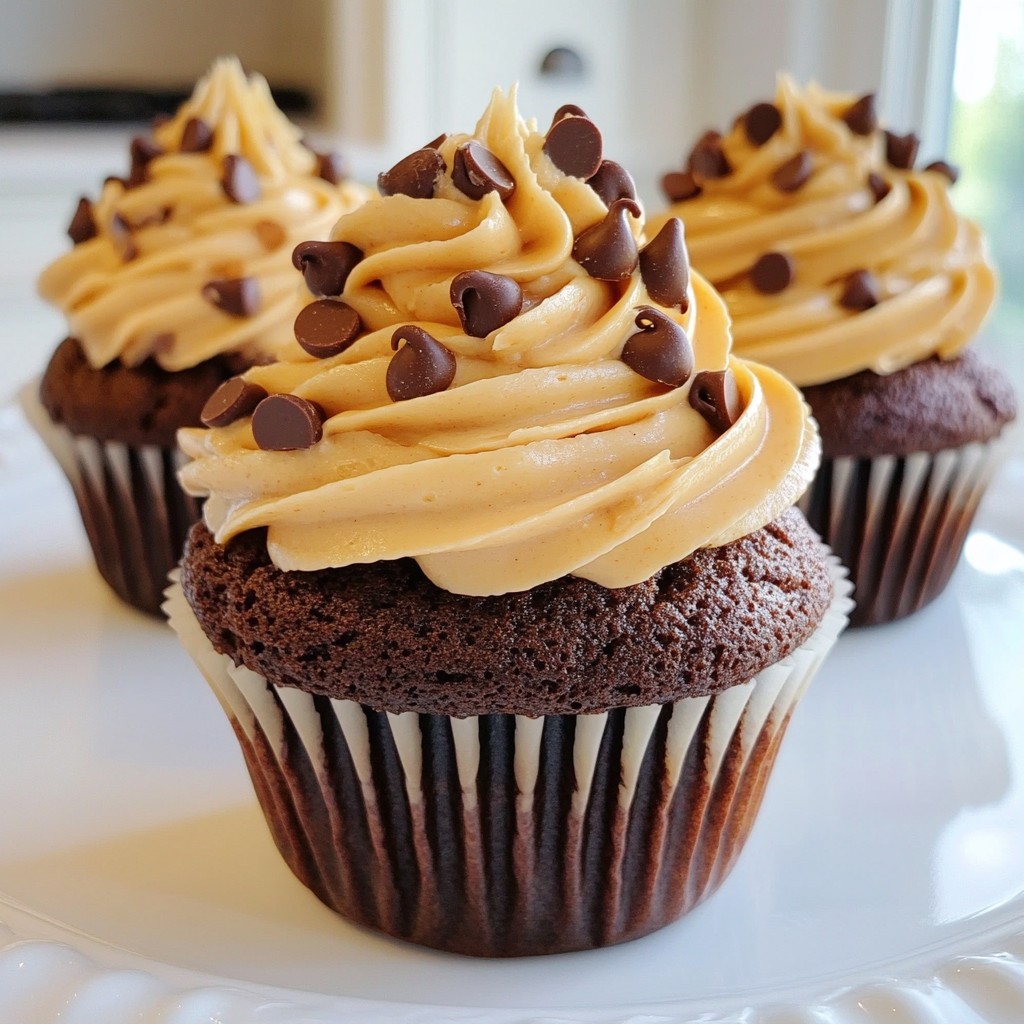
Get ready to indulge in a treat that marries rich chocolate with creamy peanut butter! In this post, you'll learn how to create mouthwatering Chocolate Peanut Butter Cupcakes that are sure to impress. I’ll guide you through the essential ingredients, step-by-step instructions, and some clever tips to make your cupcakes perfect. Let’s dive into this sweet and decadent journey together!
Why I Love This Recipe
- Irresistible Flavor: The combination of rich chocolate and creamy peanut butter creates a flavor explosion that is hard to resist.
- Decadent Texture: These cupcakes are incredibly moist and fluffy, topped with a smooth frosting that melts in your mouth.
- Easy to Make: With simple ingredients and straightforward steps, these cupcakes are perfect for bakers of all skill levels.
- Perfect for Sharing: These cupcakes are a crowd-pleaser, making them ideal for parties, gatherings, or just a sweet treat at home.
Ingredients
Essential Ingredients for the Cupcakes
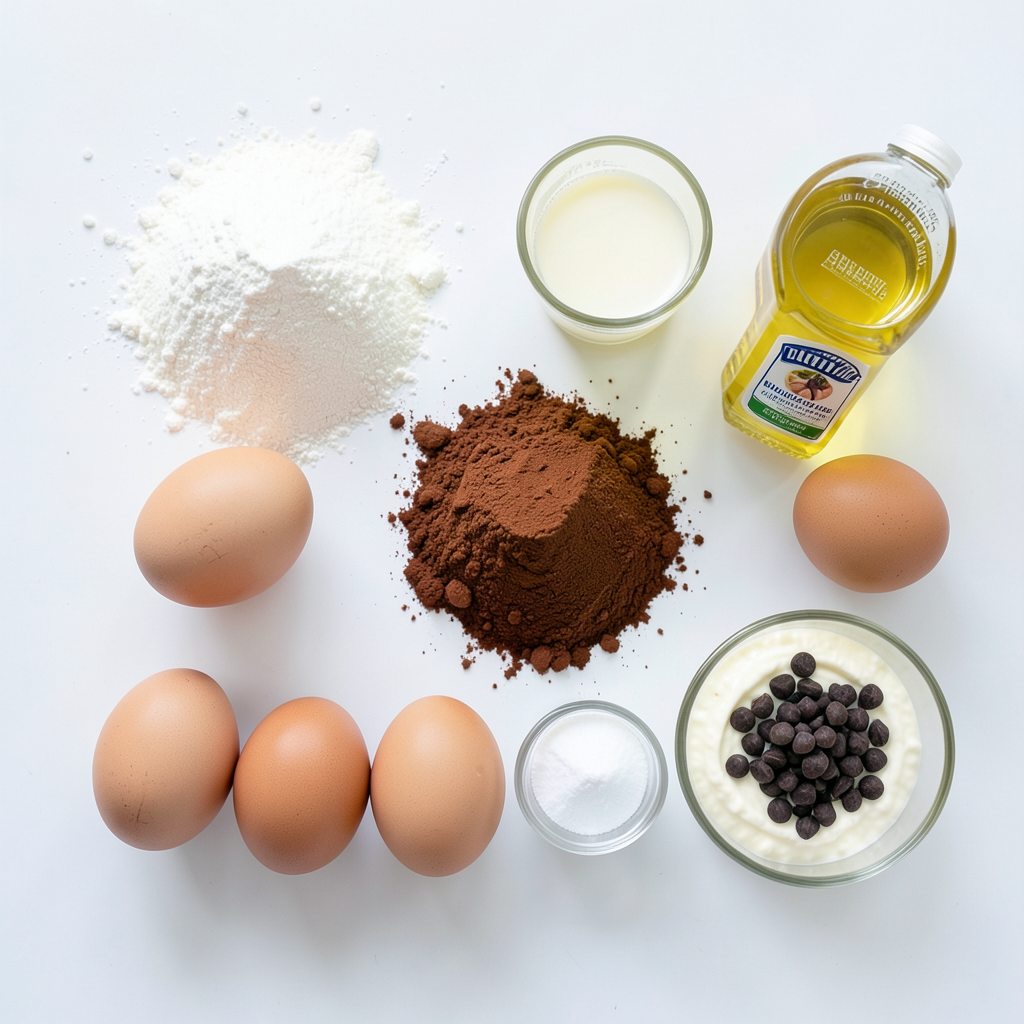
- Flour and Sweeteners: You need 1 cup of all-purpose flour and 1 cup of granulated sugar. These give the cupcakes their base and sweetness.
- Cocoa Powder and Dry Ingredients: Use 1/2 cup of unsweetened cocoa powder, 1 teaspoon of baking powder, 1/2 teaspoon of baking soda, and 1/4 teaspoon of salt. The cocoa adds rich flavor, while the baking powder and soda help the cupcakes rise.
- Wet Ingredients Essentials: Gather 2 large eggs, 1/2 cup of whole milk, 1/2 cup of vegetable oil, and 1 teaspoon of pure vanilla extract. These ingredients bring moisture and flavor. Finally, 1/2 cup of boiling water is crucial. It helps make the batter thin and ensures a moist cupcake.
Key Ingredients for Peanut Butter Frosting
- Creamy Peanut Butter: You will need 1/2 cup of creamy peanut butter. This is the star of your frosting, adding rich taste and creaminess.
- Optional Ingredients for Texture: Consider adding 1/4 cup of unsweetened Greek yogurt. This makes the frosting creamier and adds a slight tang.
- Toppings and Garnishing Options: For extra flair, use chocolate chips for garnish. These add sweetness and a nice look to your cupcakes. You can sprinkle them on top after frosting for a fun finish.
Step-by-Step Instructions
Prepping Your Kitchen
- Preheating the Oven: Start by setting your oven to 350°F (175°C). This temperature gives the cupcakes the perfect bake.
- Preparing the Muffin Tin: Line a standard muffin tin with 12 cupcake liners. This makes it easy to remove the cupcakes once they cool.
Mixing Ingredients
- Combining Dry Ingredients: In a large bowl, whisk together these dry ingredients:
- 1 cup all-purpose flour
- 1 cup granulated sugar
- 1/2 cup unsweetened cocoa powder
- 1 teaspoon baking powder
- 1/2 teaspoon baking soda
- 1/4 teaspoon salt
This mixture should be light and fluffy.
- Mixing Wet Ingredients: In another bowl, mix these wet ingredients:
- 2 large eggs, at room temperature
- 1/2 cup whole milk, at room temperature
- 1/2 cup vegetable oil
- 1 teaspoon pure vanilla extract
Whisk until smooth and creamy.
Baking the Cupcakes
- Merging Wet and Dry Mixtures: Slowly pour the wet mix into the dry mix. Stir gently until just combined. Avoid overmixing.
- Filling the Muffin Tin: Use a ladle or cookie scoop to fill each cupcake liner about two-thirds full. This helps them rise nicely as they bake.
- Bake and Cool Timing: Bake in the preheated oven for 18-20 minutes. Check with a toothpick; it should come out clean. Let them cool in the tin for 5 minutes, then move them to a wire rack to cool completely.
Tips & Tricks
Perfecting Your Cupcakes
Measuring Ingredients Accurately Accurate measuring is key to great cupcakes. Use dry measuring cups for flour and sugar. Spoon flour into the cup and level it off with a knife. This ensures you don’t add too much flour, which can make cupcakes dense.
Avoiding Common Baking Mistakes Overmixing is a common mistake. Mix just until the dry and wet ingredients blend. This keeps the cupcakes light and fluffy. Also, make sure your oven is at the right temperature. An oven thermometer can help if you're unsure.
Enhancing Flavor and Texture
Using Greek Yogurt Adding Greek yogurt to your frosting can make it creamier. This ingredient gives a nice tang and helps the frosting hold its shape. Mixing it in with peanut butter creates a smooth blend that tastes amazing.
Optional Ingredients to Consider Feel free to add chocolate chips to the batter. They melt slightly and add extra chocolatey goodness. You can also experiment with spices like cinnamon for a warm flavor twist.
Frosting Tips
Best Techniques for Frosting Use a spatula or piping bag for frosting. Start from the outside and swirl inwards. This creates a beautiful look on top of your cupcakes. If you want a smoother finish, use a small offset spatula.
Allowing Frosting to Set After frosting, let the cupcakes sit for a few minutes. This helps the frosting firm up a bit. It makes them easier to serve and eat. Plus, the frosting will look neat and appealing!
Pro Tips
- Room Temperature Ingredients: Ensure your eggs and milk are at room temperature before mixing. This helps create a smoother batter and results in a lighter cupcake.
- Boiling Water Magic: Adding boiling water to the batter might seem unusual, but it helps to intensify the chocolate flavor and ensures a moist texture.
- Frosting Consistency: If the peanut butter frosting is too thick, simply add a splash of milk to reach your desired consistency for easier spreading or piping.
- Garnish with Purpose: Sprinkle chocolate chips on top of the frosting not only for decoration but also to add an extra layer of chocolatey goodness to each bite.
Variations
Flavor Variations
You can switch up the flavor of your chocolate peanut butter cupcakes with fun additions. For a minty twist, add peppermint extract to your batter or frosting. This gives a fresh, cool flavor that pairs well with chocolate. If you love coffee, try adding espresso powder to the batter. It enhances the chocolate taste, making it richer and deeper.
If you need a gluten-free option, swap the all-purpose flour for a gluten-free blend. Many blends work well, so you can still enjoy these cupcakes without gluten. Just make sure to follow the package instructions for best results.
Frosting Variations
While peanut butter frosting is a star, you can mix it up with dark chocolate frosting. Simply melt dark chocolate and fold it into the peanut butter frosting for a richer taste. This combo creates a bold flavor that chocolate lovers will adore.
For those with nut allergies, consider a nut-free frosting. Use sun butter or a seed butter instead. This way, everyone can enjoy the sweetness of your cupcakes without worry.
Garnishing Ideas
Garnishing your cupcakes can be fun! Get creative with toppings. Try crushed cookies, chopped nuts, or sprinkles for a colorful look. You can even use mini peanut butter cups as a fun surprise on top.
Adding fresh ingredients can elevate your cupcakes. Consider using fresh raspberries or strawberries as a topping. They add a nice pop of color and a burst of flavor that pairs beautifully with chocolate and peanut butter.
Storage Info
Storing Cupcakes
- Room Temperature Storage: Keep your cupcakes in a cool, dry place. Use a cake dome or a sealed container. They stay fresh for up to three days. Avoid direct sunlight to keep them moist.
- Refrigeration Tips: If you want to store them longer, place cupcakes in the fridge. Use an airtight container to prevent them from drying out. They can last up to a week in the fridge. Let them sit at room temperature for a few minutes before serving.
Freezing and Thawing
- How to Freeze Cupcakes: Wrap each cupcake tightly in plastic wrap. Place them in a freezer-safe bag. They can stay frozen for up to three months. Don’t frost them before freezing for better results.
- Best Practices for Thawing: To thaw, move the cupcakes to the fridge overnight. You can also leave them at room temperature for about one hour. Avoid using a microwave, as it can make them soggy.
Shelf Life
- How Long Cupcakes Last: Unfrosted cupcakes last up to a week at room temperature. Frosted ones stay fresh for about five days. Refrigerated cupcakes can last a whole week.
- Signs of Spoilage: Check for dryness or changes in smell. If they feel hard or have mold, it’s time to discard them. Fresh cupcakes should be soft and fragrant.
FAQs
How to Make Chocolate Peanut Butter Cupcakes?
To make these cupcakes, follow these steps:
1. Preheat the Oven: Set your oven to 350°F (175°C). Line a muffin tin with 12 cupcake liners.
2. Combine Dry Ingredients: In a bowl, mix 1 cup flour, 1 cup sugar, 1/2 cup cocoa powder, 1 teaspoon baking powder, 1/2 teaspoon baking soda, and 1/4 teaspoon salt.
3. Mix Wet Ingredients: In a separate bowl, whisk together 2 eggs, 1/2 cup milk, 1/2 cup oil, and 1 teaspoon vanilla until smooth.
4. Merge Mixtures: Slowly add wet ingredients to dry. Stir gently. Then mix in 1/2 cup boiling water. The batter will be thin.
5. Bake the Cupcakes: Fill each liner about two-thirds full. Bake for 18-20 minutes. Check with a toothpick. Let cool for 5 minutes in the pan, then move to a wire rack.
6. Prepare the Peanut Butter Frosting: Beat together 1/2 cup peanut butter and 1/2 cup powdered sugar until creamy. If using, fold in 1/4 cup Greek yogurt.
7. Frost the Cupcakes: Once cool, frost each cupcake with the peanut butter mix. Swirl it on top.
8. Add the Finishing Touch: Sprinkle chocolate chips on top for extra sweetness.
Can I Make These Cupcakes Ahead of Time?
Yes, you can make these cupcakes ahead of time.
- Storage Recommendations: Keep them in an airtight container at room temperature for up to 3 days. If you frost them, store in the fridge to keep the frosting fresh. They can last about 5 days in the fridge.
What Can I Use Instead of Peanut Butter?
If you need a substitute for peanut butter, there are great options:
- Alternative Nut Options: Use almond butter or cashew butter for a similar flavor.
- Nut-Free Options: Try sunflower seed butter or a soy nut butter. These options work well and keep the cupcakes delicious and safe for those with nut allergies.
This blog post covers everything you need to make delicious chocolate peanut butter cupcakes. We explored essential ingredients, step-by-step instructions, and helpful tips to ensure perfect results. I also shared tasty variations and storage methods to keep your treats fresh.
Baking these cupcakes is fun and rewarding. With practice, you'll master them. Enjoy the process, share with friends, and add your own twist. Your cupcakes will be a hit!