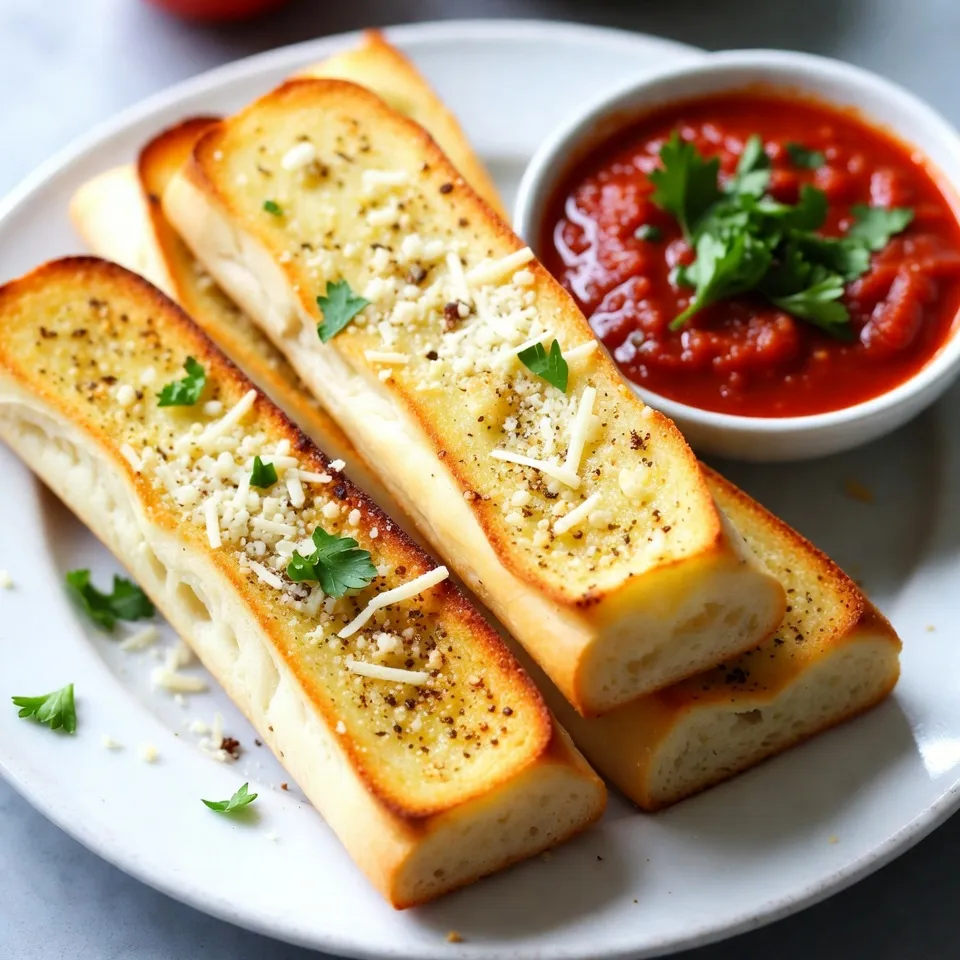
If you love warm, cheesy snacks, you’re in the right place! My simple Garlic Parmesan Breadsticks recipe will bring joy to your taste buds. With just a few ingredients and straightforward steps, you’ll have soft, buttery breadsticks in no time. Perfect for pairing with soups or just enjoying on their own, these breadsticks are sure to become a family favorite. Let’s dive into this deliciously easy recipe!
Why I Love This Recipe
- Delicious Flavor: The combination of garlic and Parmesan creates a mouthwatering flavor that pairs perfectly with any meal.
- Easy to Make: With simple ingredients and straightforward steps, even novice bakers can achieve bakery-quality breadsticks.
- Perfect for Dipping: These breadsticks are ideal for dipping in marinara or garlic sauce, making them a hit at any gathering.
- Customizable: You can easily add herbs or spices to suit your personal taste, allowing for endless variations.
Ingredients
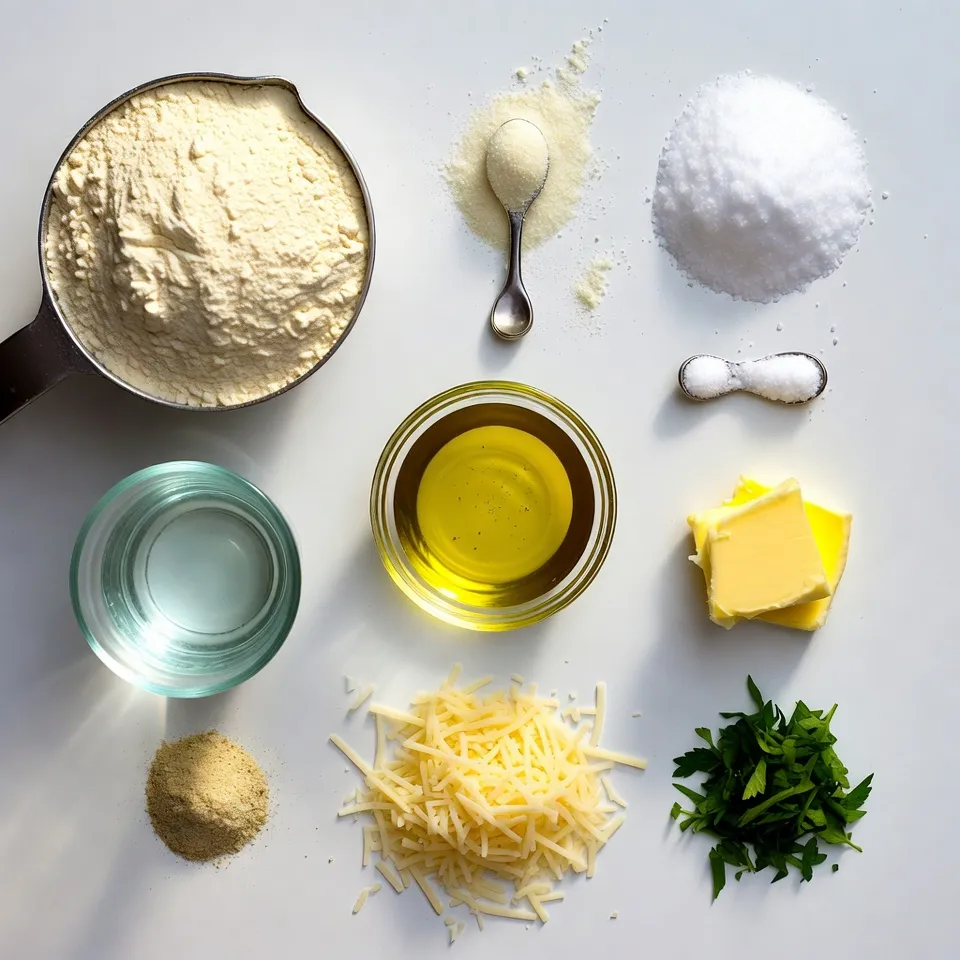
Full list of ingredients
– 2 cups all-purpose flour
– 1 teaspoon active dry yeast
– 1 tablespoon granulated sugar
– 1 teaspoon salt
– ¾ cup warm water (approximately 110°F or 43°C)
– 2 tablespoons extra virgin olive oil
– 3 tablespoons unsalted butter, melted
– 1 teaspoon garlic powder
– ½ cup freshly grated Parmesan cheese
– 1 tablespoon finely chopped fresh parsley (optional)
– Extra flour for dusting
Measurement details
I like to be precise with my measurements. Accurate amounts lead to tasty breadsticks. Use a standard measuring cup for the flour. The yeast and sugar need just a teaspoon each. For salt, stick to one teaspoon too. Warm water is key; aim for ¾ cup at the right temperature. Use two tablespoons of olive oil and three tablespoons of melted butter. Lastly, you’ll need half a cup of Parmesan cheese and one tablespoon of parsley, if desired.
Optional ingredients for added flavor
While the basic recipe shines, you can make it even better. Try adding a pinch of red pepper flakes for some heat. Dried oregano or basil can give your breadsticks a herby twist. If you like a touch of sweetness, drizzle honey or maple syrup on top before baking. These additions can change the flavor and make each batch unique. Explore different combinations to find what you love!
Step-by-Step Instructions
Activating the yeast
To start, we need to wake up the yeast. In a small bowl, mix ¾ cup of warm water with 1 tablespoon of granulated sugar and 1 teaspoon of active dry yeast. The water should feel warm, like a cozy bath. Let this sit for about 5 to 10 minutes. You will see bubbles forming on top. This froth shows that the yeast is alive and ready to work.
Mixing and kneading the dough
Next, grab a large mixing bowl. In it, whisk together 2 cups of all-purpose flour and 1 teaspoon of salt. Make a little well in the center of the flour. Pour in the activated yeast mixture and 2 tablespoons of olive oil. Now, use a wooden spoon or your hands to mix everything. You want to form a soft dough. Once it looks good, transfer the dough to a floured surface. Knead the dough for 5 to 7 minutes until it’s smooth and elastic. It should feel nice and soft.
After kneading, lightly grease a bowl with olive oil. Place the dough in the bowl and turn it so it gets coated in oil. Cover the bowl with a kitchen towel. Find a warm spot for it to rise. Let it sit for about 1 hour, or until it doubles in size.
Shaping and baking the breadsticks
Once the dough has risen, it’s time to shape it. Gently punch it down to release the air. Roll the dough out into a rectangle about ½ inch thick on a floured surface. Now, grab a sharp knife or a pizza cutter. Cut the dough into strips, about 1 inch wide and 6 to 8 inches long.
Arrange these strips on a baking sheet lined with parchment paper. Make sure to leave space between them. This will help them grow while baking. Brush the tops with melted butter. Sprinkle garlic powder and grated Parmesan cheese on top. If you want, add some finely chopped parsley for extra flavor and color.
Preheat your oven to 400°F (200°C). Bake the breadsticks for 12 to 15 minutes until they turn golden brown and smell amazing. Once done, let them cool slightly on the baking sheet before serving. Enjoy your warm and tasty garlic Parmesan breadsticks!
Prep Time and Cooking Time
Breakdown of prep and cook duration
To make these garlic Parmesan breadsticks, you need about 15 minutes for prep. This includes mixing the dough and letting it rise. The total time from start to finish is about 1 hour and 30 minutes. Here’s how it breaks down:
– Prep time: 15 minutes
– Rise time: 1 hour
– Bake time: 12-15 minutes
This simple timing lets you enjoy fresh breadsticks without too much fuss.
Tips for efficient preparation
To make prep easier, gather all your ingredients first. This way, you won’t waste time searching for items while cooking. Here are some more tips:
– Measure out your flour and water ahead of time.
– Use a timer to keep track of the rise time.
– Clean as you go to save time later.
These small steps can make cooking much smoother.
Suggested serving size specifications
This recipe makes 12 breadsticks. Each breadstick is about 6-8 inches long. They are great for sharing, but you can adjust the size if you want smaller bites. Serve these warm and enjoy them with marinara sauce or garlic dip.
Pro Tips
- Use Fresh Yeast: For the best flavor and texture, use fresh active dry yeast. Check the expiration date before use to ensure it is still effective.
- Don’t Skip the Rise: Allowing the dough to rise properly is crucial for achieving a light and airy texture. Be patient and let it double in size!
- Customize Your Toppings: Feel free to experiment with different cheeses or herbs. Adding a pinch of red pepper flakes can give your breadsticks a nice kick!
- Serve Warm: These breadsticks are best enjoyed warm right out of the oven. Serve them immediately for the best flavor and texture.
Tips & Tricks
How to achieve the perfect breadstick texture
To get the best texture for your breadsticks, start with the right flour. Use all-purpose flour for a nice, soft bite. Knead the dough until it feels smooth and elastic. This helps the breadsticks rise well. Let the dough rise in a warm spot. A good rise makes them fluffy inside. When rolling out the dough, keep it about half an inch thick. This thickness creates a nice balance between chewy and soft.
Avoiding common mistakes
Common mistakes can ruin your breadsticks. First, make sure your yeast is fresh. Old yeast won’t rise, and your breadsticks will be flat. Don’t skip the rising time. This step is key for texture. If you rush, they will be dense and hard. Also, avoid adding too much flour when kneading. Adding too much can make the breadsticks dry. Instead, keep your work surface lightly floured. This way, the dough can stay moist and soft.
Enhancing flavor with additional toppings
To boost the flavor of your breadsticks, try adding toppings. Besides garlic powder, you can sprinkle on some Italian herbs. Oregano or basil adds a nice touch. You could also mix in some crushed red pepper for heat. If you love cheese, try adding mozzarella or cheddar on top. For a twist, brush with garlic butter after baking. This makes them even more delicious and fragrant. You can also serve them with marinara sauce or ranch dressing for dipping.
Variations
Flavor variations (e.g., adding herbs or spices)
You can easily change the flavor of these breadsticks. Try adding herbs like rosemary or thyme to the dough. You can mix in 1-2 teaspoons of dried herbs. Want a spicy kick? Add a pinch of crushed red pepper flakes. You can even use fresh herbs, like basil or oregano, for extra taste. This will make your garlic Parmesan breadsticks unique and fun!
Gluten-free alternatives
If you need a gluten-free option, use gluten-free flour instead of all-purpose flour. Make sure the flour blend contains xanthan gum for the right texture. You can find many good brands online or in stores. Follow the same steps from the recipe, and you will enjoy soft and tasty breadsticks. Everyone can enjoy these delicious treats!
Different cheese options to use
While Parmesan is classic, feel free to try other cheeses. Mozzarella gives a nice gooey texture. Cheddar adds a sharp flavor. Or mix different cheeses for a gourmet twist. Use about ½ cup of your favorite cheese, grated or shredded. This adds richness and makes your breadsticks even more delightful. Experiment with flavors and find your perfect match!
FAQs
How to store leftover breadsticks?
To store leftover breadsticks, place them in an airtight container. Keep them at room temperature for up to two days. If you want them to last longer, wrap them in foil. This keeps them soft. You can also place them in the fridge, but this may make them a bit dry.
Can I freeze garlic Parmesan breadsticks?
Yes, you can freeze garlic Parmesan breadsticks. Let them cool completely first. Then, wrap each breadstick in plastic wrap. Place the wrapped breadsticks in a freezer bag. They can stay in the freezer for up to three months. When you want to eat them, thaw them in the fridge overnight and reheat.
What to serve with garlic Parmesan breadsticks?
Garlic Parmesan breadsticks pair well with many dishes. They are great with marinara sauce for dipping. You can also serve them with soups, salads, or pasta. For a fun twist, try them with a creamy garlic dip. This will enhance their flavor and make your meal even better.
In this post, we covered all you need for making delicious garlic Parmesan breadsticks. We outlined the full list of ingredients, shared step-by-step instructions, and discussed prep and cook time in detail. I also shared useful tips, variations, and answered common questions.
Now, it’s time to get baking. Enjoy these breadsticks with your favorite meals or snacks. You’ll impress everyone with your skills and flavor. Happy cookin