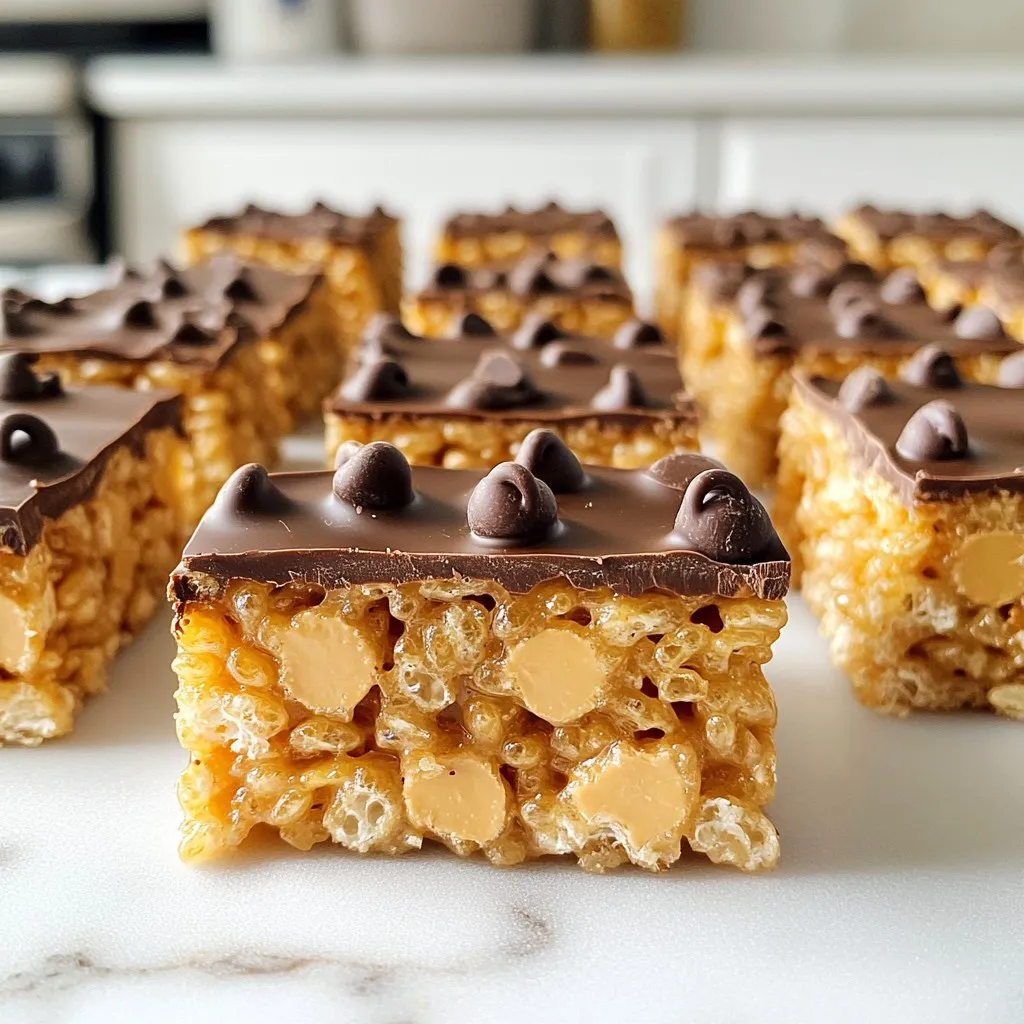
Get ready to indulge in a sweet treat that combines the rich flavors of peanut butter and chocolate! In this blog post, I’ll share my favorite recipe for Peanut Butter Chocolate Rice Krispie Treats. You’ll learn about the essential ingredients, step-by-step instructions, and clever tips to make these delicious snacks. Whether you’re a beginner or a seasoned pro, these treats are sure to delight everyone in your home. Let’s get started!
Why I Love This Recipe
- Quick and Easy: This recipe comes together in just under an hour, making it perfect for a last-minute treat or snack.
- Delicious Flavor Combination: The pairing of peanut butter and chocolate is always a crowd-pleaser, hitting that sweet and salty spot.
- Customizable: You can easily adjust the recipe by adding nuts, dried fruit, or even using different types of chocolate.
- Kid-Friendly: These treats are not only loved by kids but are also a fun and easy recipe for them to help make!
Ingredients
Complete List of Ingredients
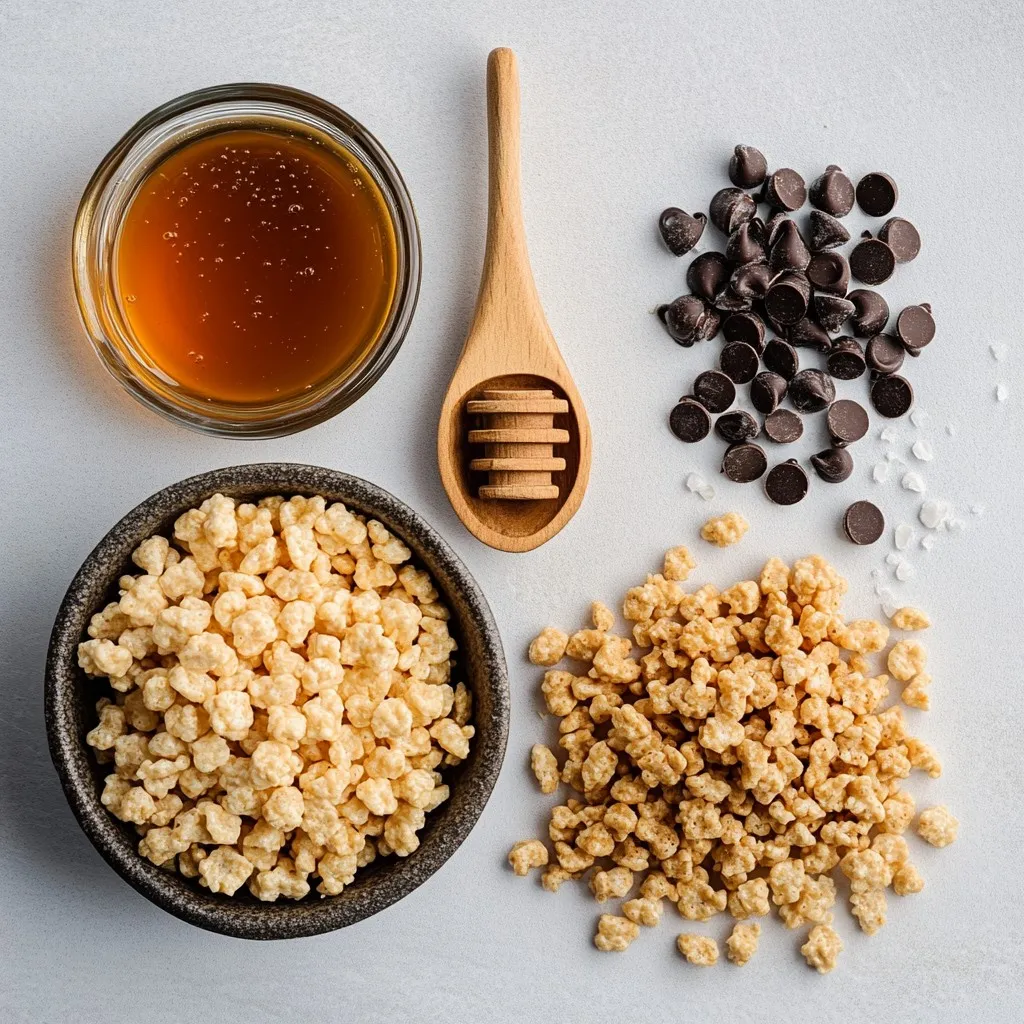
– 3 cups Rice Krispies cereal
– 1 cup creamy peanut butter
– 1 cup semi-sweet or dark chocolate chips
– ½ cup honey or maple syrup
– 1 teaspoon vanilla extract
– A pinch of salt
– ½ cup additional chocolate chips for topping (optional)
Importance of Ingredient Quality
Using high-quality ingredients makes a big difference. Fresh Rice Krispies give a nice crunch. Creamy peanut butter adds a rich flavor and smooth texture. Choose chocolate chips that you enjoy eating. Good honey or maple syrup enhances sweetness and depth. Each ingredient plays a role in taste and texture.
Alternatives and Substitutes
You can switch things up if needed. Use crunchy peanut butter for added texture. Swap honey with agave syrup if you want a vegan option. Dark chocolate chips can give a richer taste. If you prefer, you can use other cereals like Cornflakes for a different crunch.
Step-by-Step Instructions
Detailed Cooking Process
Start by prepping your pan. Grease an 8×8 inch baking dish with non-stick spray or line it with parchment paper. This makes it easy to remove the treats later. Next, grab a large saucepan. Set it over medium heat and add the creamy peanut butter, honey, and a pinch of salt. Stir the mix continuously for about 2-3 minutes. You want it to be smooth and lightly bubbling.
Once bubbling, take the pan off the heat. Stir in the vanilla extract, mixing well to boost the flavor. Now, it’s time for the star of the show. Quickly pour the Rice Krispies into the warm peanut butter mix. Use a spatula to fold gently, ensuring every piece gets coated.
While the mix is still warm, fold in 1 cup of chocolate chips. This lets them melt slightly, creating a rich blend. Transfer everything to your prepared baking dish. Use the spatula’s back to press it down firmly, filling all the corners.
Special Techniques for Mixing
When combining the Rice Krispies with the peanut butter mix, be gentle. You want to avoid crushing the cereal. Folding is key here. This technique helps keep the treats light and airy. For the chocolate chips, mix them in while the base is warm. This way, they melt just enough to create a nice swirl.
Tips for Serving and Presentation
For a lovely presentation, serve the bars on a bright plate. If you want to impress, drizzle melted chocolate over the top. It adds flair and extra sweetness. After cutting the bars, consider packaging them in clear bags tied with a ribbon. This makes them perfect for sharing or gifting. Enjoy your delicious Peanut Butter Chocolate Rice Krispie Treats!
Tips & Tricks
Common Mistakes to Avoid
When making Peanut Butter Chocolate Rice Krispie Treats, avoid these common mistakes:
– Overheating the mixture: Heat it just until it bubbles.
– Not mixing fast enough: Fold in the Rice Krispies quickly to keep them from getting soggy.
– Pressing too hard: Use gentle pressure when pressing into the pan; too much can make them tough.
– Skipping the salt: A pinch of salt balances the sweet flavors.
How to Achieve the Perfect Texture
To get that perfect chewy texture, keep these tips in mind:
– Use fresh Rice Krispies: Stale cereal will not hold the right crunch.
– Mix while warm: Add chocolate chips while the mixture is still warm. This helps them melt slightly and blend better.
– Press evenly: When transferring to the pan, ensure an even layer to help them set properly.
– Cool in the fridge: Chill them for at least 30 minutes to firm up the bars.
Enhancing Flavor with Add-ins
You can elevate the flavor of your treats with these add-ins:
– Nuts: Chopped peanuts or almonds add crunch.
– Dried fruit: Raisins or cranberries give a sweet twist.
– Flavor extracts: A splash of almond or coconut extract enhances the taste.
– Spices: A dash of cinnamon or sea salt on top can add depth.
Pro Tips
- Use Fresh Ingredients: Always check the freshness of your peanut butter and chocolate chips to ensure the best flavor and texture in your treats.
- Customize Your Sweetness: Adjust the amount of honey or maple syrup to taste. If you prefer a less sweet treat, reduce the quantity slightly.
- Melt Chocolate Wisely: To get a smooth chocolate topping, melt the additional chocolate chips gently in the microwave or over a double boiler before drizzling.
- Storage Tips: Store leftovers in an airtight container at room temperature for up to a week, or refrigerate for longer freshness.
Variations
Different Chocolate Options
You can switch up the chocolate in your treats. Instead of semi-sweet or dark chocolate chips, try milk chocolate for a sweeter taste. You can also use white chocolate for a fun change. For a richer flavor, consider using dark chocolate with a higher cocoa content. Each option adds a unique twist to the classic recipe.
Nut-Free and Dairy-Free Alternatives
If you need nut-free treats, use sun butter instead of peanut butter. This option keeps the creamy texture while being safe for those with nut allergies. For a dairy-free choice, use dairy-free chocolate chips. Check the labels to ensure they fit your dietary needs. These swaps make the treats accessible to more people.
Flavor Additions (e.g., Extracts, Nuts)
Adding flavor is easy! A teaspoon of almond extract can give a lovely touch. You can also mix in chopped nuts, like almonds or walnuts, for crunch. If you want a fruity twist, try dried fruit like cranberries or raisins. These additions make each bite exciting and full of flavor.
Storage Info
Best Practices for Storing Treats
To keep your Peanut Butter Chocolate Rice Krispie Treats fresh, store them in an airtight container. This helps keep them soft and chewy. You can place parchment paper between layers to prevent them from sticking. Keep the container at room temperature, away from heat or direct sunlight.
How Long Do They Last?
When stored properly, these treats can last up to one week. If you notice they start to harden, they are still safe to eat. However, they may not be as enjoyable. If you want to keep them longer, consider freezing them.
Freezing for Longer Storage
To freeze your treats, first cut them into squares. Wrap each square tightly in plastic wrap or foil. Place them in a freezer bag or container. They can last up to three months in the freezer. When you want to enjoy them, let them thaw at room temperature for about 30 minutes. This way, they taste fresh and delicious!
FAQs
Can I use crunchy peanut butter instead?
Yes, you can use crunchy peanut butter. It adds a fun texture. The bites become more interesting with the added crunch. Just keep in mind that you will lose some creaminess. This can make the bars a bit more crumbly, but they will still taste great!
How do I know when they are set?
You can tell they are set when they feel firm to the touch. After cooling for 15-20 minutes at room temperature, place them in the fridge for at least 30 minutes. This helps them firm up more. If they hold their shape when you cut them, they are ready to enjoy!
Can I make these vegan-friendly?
Yes, you can make these treats vegan! Use maple syrup instead of honey. Choose dairy-free chocolate chips for a vegan option. This way, everyone can enjoy these tasty bars. They still taste rich and delicious, even without animal products!
In this blog post, I covered the key ingredients needed for our recipes, from quality to substitutes. I shared a step-by-step guide for cooking, mixing techniques, and tips for serving. I also included helpful tricks to avoid mistakes and achieve great texture. We explored variations like different chocolate options and dietary needs. Finally, I discussed how to store treats properly. Remember, using the best ingredients and techniques leads to the best results. Enjoy your cooking and get creative with your flavor